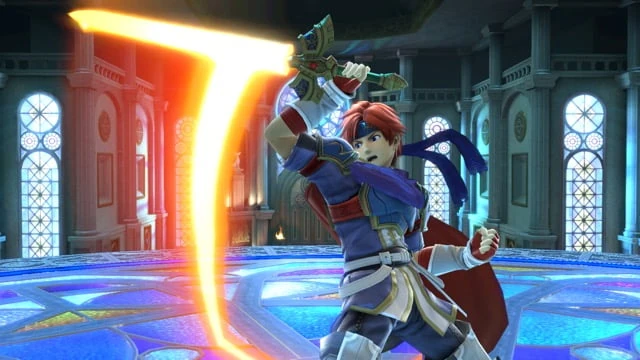
On July 27th, I had a session with the MelPool Cosplay to test my new stained glass concept. At first, I was concerned that Roy from Fire Emblem wouldn’t fit the concept, but then I saw the images of the character appearing in Super Smash Brothers. The Super Smash Brothers shows the character in a castle with large stained glass windows, so the concept was a good fit.
For this session, I used:
|
Photography Equipment |
Props/Miscellaneous |
|
Cannon R6 24-105 mm Lens Transmitter/Trigger 2 rectangular soft boxes with grid 1 1x2 strip box 2 Phottix Strobe 1 Westcott FJ400 2 C-stands Sandbags Bell reflector plus grid Backdrop stand Grey backdrop 4 two-foot Aperture light bars |
Table Bench 4 plexiglass sheets Window wrap 8 2x4 foot insulation panels Gaff tape Aluminum foil |
The set up
To see how I made the stained glass window, view
my other blog, “Stained
Glass Angel.”
For the actual set, I started by putting up a grey backdrop and draping it over a table and bench to create layers. I then placed two stained glass panels on top of the table, ensuring that I could not see the white insulation panels. I then placed two stained glass panels on the floor to create an alcove type space. At the bottom of each stained-glass panel structure, I placed a two-foot Aperture light bar set to 8000K to create a nice bright light leaning towards blue.
For my starting light set up placed a strobe with a rectangular soft box with a grid to camera left at about a 45-degree angle and then a second to camera right at about 45-degrees. I then placed the FJ400 mounted on a PlataPod with a blue gel in a 1x2 soft box on the floor in front of the model.
Camera Settings
While this session was a mix of continuous and strobe light, the continuous light was fairly bright, so balancing the strobe light on the subject was relatively easy. For this session, I used ISO 400, an aperture of F8, and a shutter speed of 1/125s. My focal length varied from 25mm to 53mm, with my most common focal length being 35mm.
The Photos
This first photo shows some excellent Rembrandt
lighting and gives off a moody vibe. You
can also see the hints of blue light coming up from the bottom of the frame courtesy
of the 1x2 strip box with a blue gel I had on the floor in front of the model. In the reference images, the character stands
in a blue glow, and the scene lighting leans blue, so to mimic that, I brought
in the strip box with the blue gel. In
post I did all the basics from color correction to exposure adjustment. I also brightened the model’s face
slightly. I added a blue (shadow)/
orange (highlight) color grade to the image and finished with a heavy vignette.

This second image was of the back of the cosplay to show off the detail work on the back of the cape. It is rare that you ever see the entire back of cosplays, but there is usually just as much effort put into the back as the front. I like this image because we get a nice face profile while showing off the back. I like the facial expression because you can see the character thinking about having to turn around and fight someone or something. In post I did the basic adjustments from color correction to exposure adjustment. I also added a blue (shadow)/ orange (highlight) color grade to the image and finished with a heavy vignette. I then pulled the image over into Photoshop to extend the top of the backdrop. Problem with tall people and swords they sometimes extend past my backdrop when I’m shooting from a lower angle to make them look powerful and also because I’m short must shoot from a lower angle.

No shoot with a cape would be complete without a
cape flip image. The only problem I encountered
was that the cape extended beyond my set/backdrop. I should have caught this issue earlier and
moved the light panels to expand the set, but I was not thinking about it at
the time. Sometimes, you get caught up
trying to capture the movement and forget about the background. This results in having to do more work in
post. In post I did the basic
adjustments from color correction to exposure adjustment. I also added a blue (shadow)/ orange (highlight)
color grade to the image and finished with a heavy vignette. I then pulled the image into Photoshop to
extend the background and remove the background stand.

Final Thoughts:
The images came out nice, but I think I may need to get taller panels or something to raise them higher for taller models. I also need to remember that the panels are easily moved and I could have extended the working area for the cape flips. Finally, I need to work with some more male models and male cosplay characters so the pose suggestions flow just as naturally as when I’m working with female models and female cosplay characters.
You can see all the final images from the session here: Roy from Fire Emblem.
Credits:
Model: MelPool (IG: @melpoolcos)
Cosplay Outfit/armor: MelPool (IG: @melpoolcos)
Comments
Post a Comment