On October 9th,
I did a styled session with Lady Chapell Cosplay.
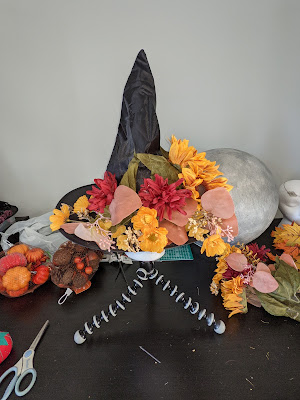
The theme for this shoot was an autumn witch, based around an autumn decorated
witch hat. When I designed the set, I went for the “witchcore” aesthetic
which is more home and garden then scary witch.
For this session I used:
|
Photography Equipment |
Props/Miscellaneous |
|
Cannon 80D Trigger 2 strobes 2 speedlights 2 c-stands 1 flag 2 gels (orange) Backdrop stand Grey backdrop A-clamps Sandbags Speedlight clamp 2 Square Soft boxes with Grid 1 Strip Box with Grid |
Peacock Chair Pumpkins and gourds Dry Ice Skull Crystal ball Chalice Fake spider Fake candles Flowers Table Bowls Hot Water |
My inspiration for the
set came from images by kladovay_mechta
out of Russia, which used wicker chairs and a lot of pumpkins. I also took inspiration
from some Pinterest post about the “witchcore” aesthetic, which is more of a styled
Halloween and not scary. So, to bring my inspiration together I sourced a
peacock chair, and a lot of pumpkins and gourds to surround it. I then added a
small table, which I placed a large chalice and a foam skull. I then strategically added fall flowers, candles,
and a large fake spider. I then hid bowl that I would fill with hot water and
dry ice to create some fog, to give the set that overall Halloween vibe. Once the set was complete, I set up the
lighting. Note I started with a basic set design, but modified it as I
progressed through the session to create three unique but similar sets.
 |
| Lighting Diagram |
The lighting for this
set used four different lights, with each light serving a purpose (see lighting
diagram). I had two strobes with square gridded soft boxes on them. The strobe
to my right was the main light angled towards the model and focused on her upper
body. The second strobe to my left was used to fill out the shadows. The strip
box with the grid, was placed on the ground to my left, with a gelled speed
light inside it. The strip box was angled to light the pumpkins and
gourds. The final speed light was gelled
and flagged, connected to the backdrop on my right, and pointed down towards
the table. The speed light connected to
the backdrop acted as a rim light, and I turned it on and off to affect the
tone and mood of the image.
Note I was working with dry ice during this session so took extra precautions. If you work with dry ice, you should be in a well-ventilated area. (I had an air purifier/fan running and windows open.) Remember to wear gloves when handling the dry ice, and the hotter the water the greater the amount of fog created but for a shorter duration of time.
Now for the actual photo
session. For this session I used an ISO of 100 and an aperture of F6.3, with a
shutter speed of 1/125s. My focal length
ranged from 18mm to 70mm with 32mm being the most common focal length. When
editing my crops tended to be square, 8.5x11, or 11x17. I use 8.5x11 and 11x17 crops because those are
the crop ratios that publications prefer.
My favorite image from the session is a very
relax pose, that just looks like a witch lost in a little day dream. I also
like how the orange gel worked with the model’s skin tone and brought a nice
warmth to the overall image. When I processed this image, I did the basic edits
and cleaned up the image some. I also
used a little bit of frequency separation. Because the candles were fake and their little
flames didn’t show up on camera, I had to edit in the candle glow. To do this I
created a separate layer then place a round dab of orange/red on each candle
then change the blend mode to brighten. I then created a dodge/burn layer and
went through and added highlights to all the areas that the candle light would
have hit. I then flattened the whole image.
This next image I feel
is very close to either a fashion image, and throughs off the relax and in
charge head witch vibe. I processed this image just like the previous
image. The only difference is that the speed
light attached to the backdrop is not on in this image, and the image relies on
the strobe to my right to light the image. You can tell because there is no rim lighting
coming from the upper corner of the image.
I like this final image
because of the overall vibe of the image, with the chair, the bubbling chalice,
skull, and pumpkins; it just gives off the Halloween/Autumn Witch vibe. It
really captures the essence of witchcore. As you can see in this image the gelled
speed light attached to the backdrop provides a nice rim light as well as adds a
warm depth to the image. I edited this
image the same way as the previous images. It was very important to use the
doge/burn layer to make sure the details were correctly highlighted and balanced
with the shadows.
This set of images shows
how you can start with a basic set and make simple modifications to add variety
to the images to keep them fresh throughout a session (my sessions are an
hour). Overall, I’m happy with how the images turned out and how the set came together. Images from this session will be published in
the November issue of Know Magazine.


Comments
Post a Comment